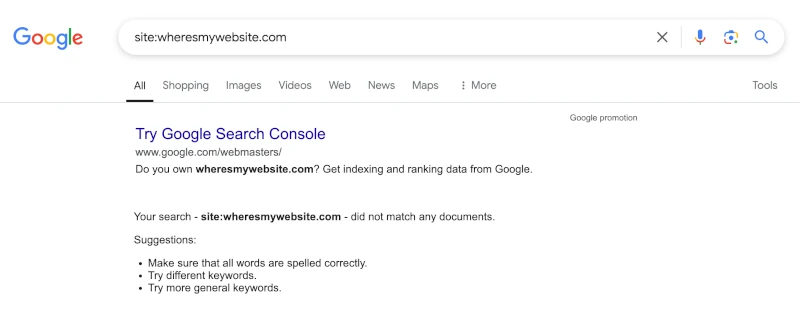
How to add your new website to google search. You’ve made a new website, you know it’s online, you’ve searched for it using google, but your website isn’t shown in search results. Why this can happen with a new website and how to add your new website to google search.
Google search basics
Google has to read your website to know about it. Google needs to know about your website to be able to display it in search results.
Google reads (or indexes) your website using the google bot. The google bot is a program that’s been written to read websites. Programs of this nature can also be referred to as bots, crawlers, spiders and robots. These terms all mean the same thing: a program written to read a website.
When the google bot reads your website, the first thin it checks for is a robots.txt file. The robots.txt file tells the google bot what it should and should’t read, and it also defines where your website’s sitemap is.
Your website’s site map is a file that contains a list of your website’s pages. The google bot uses this file to establish which pages of your website it should read.
Whilst the google bot will try and read your site (and is able to do so) if there is no robots.txt or sitemap, it’s considered a good practice to have both in place, as they effectively instruct the google bot how to read your site.
I’ll explain more about robots.txt, the sitemap and how to ask the google bot to index your website, but for now, the key points are that when google reads your website it looks for a robots.txt file, and that the robots.txt files should refer to a sitemap that contains a list of your website’s pages.
Given enough time, the google bot will eventually find your website and read it, but how long it will take to do this can be very variable.
So now you know about the google bot, indexing, robots.txt and the sitemap, let’s look at some causes of why google doesn’t list your site in search results.
How to check if google has indexed your website
You can carry out a quick test to see if google has indexed your website, using google search itself.
For example’s sake, let’s say your new website is https://www.thisismynewwebsite.com .
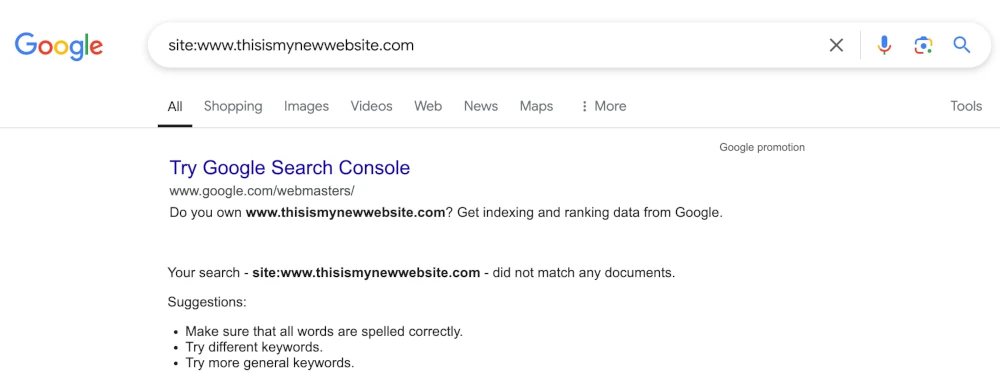
To check if google has indexed your site, you’d type this in to google search and then press return:
site:www.thisismynewwebsite.com
If you do see results, google has indexed your site, but if you don’t get any results listed as below, google hasn’t yet indexed your site.
Getting started with google webmaster tools
You’ll need a google webmaster tools account to request that google index your site. You can sign up for a google webmaster tools account here:
https://search.google.com/search-console/about
After signing up, you’ll then need to add your site as a property. You can find google’s guidance covering this here:
https://support.google.com/webmasters/answer/34592?hl=en
When adding your site, you’ll need to verify ownership. This can be done in two ways:
Using an HTML file to verify your website
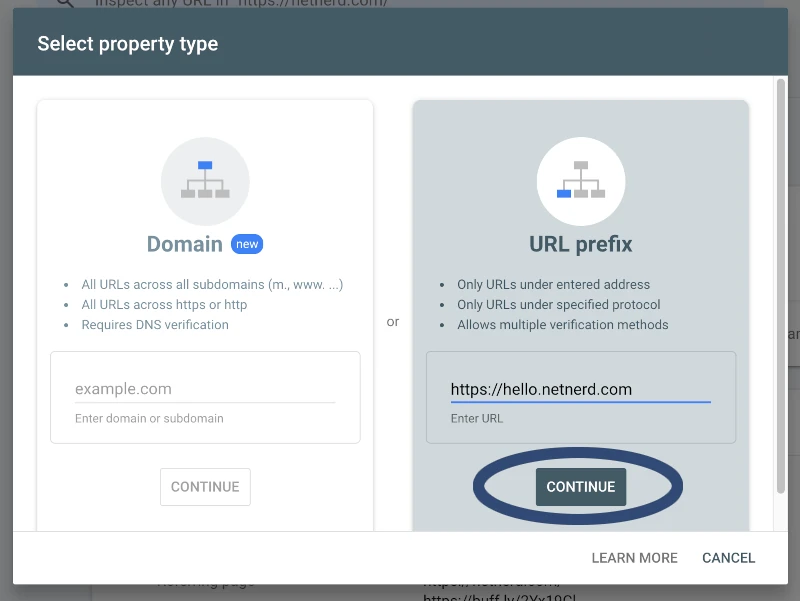
Toward the top right hand corner either click “add property” or click the drop down in the top right, then click “add property”.
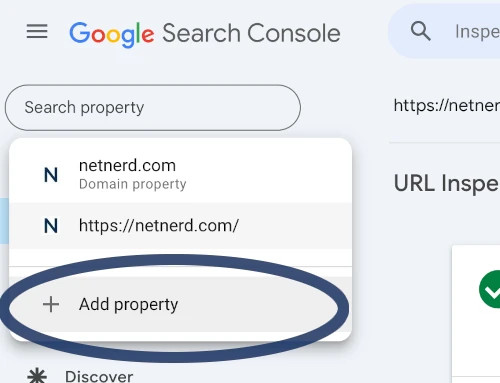
Unless, you’re going to be using multiple subdomains, enter the address of your site in the URL Prefix section, then click continue:
Download the HTML file from your google webmaster tools account, by clicking on the name of the HTML file:
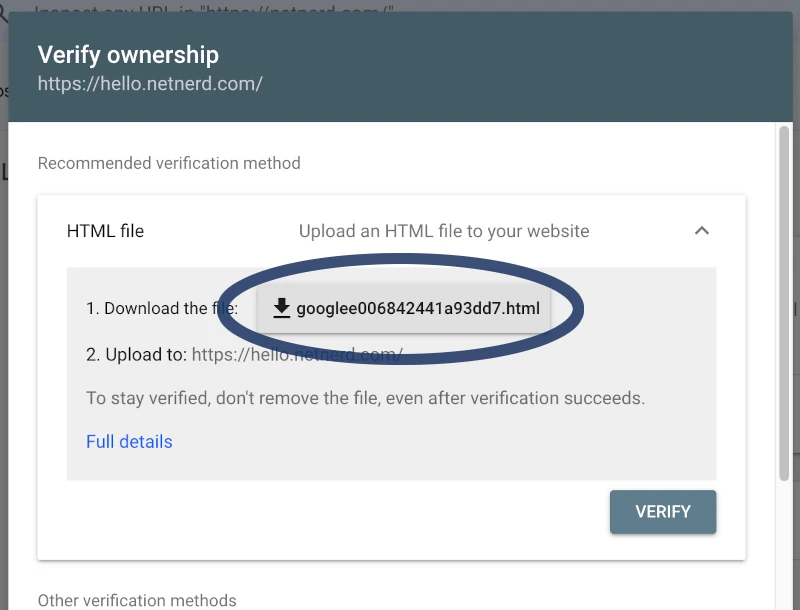
The HTML verifiction file will then be downloaded to your computer.
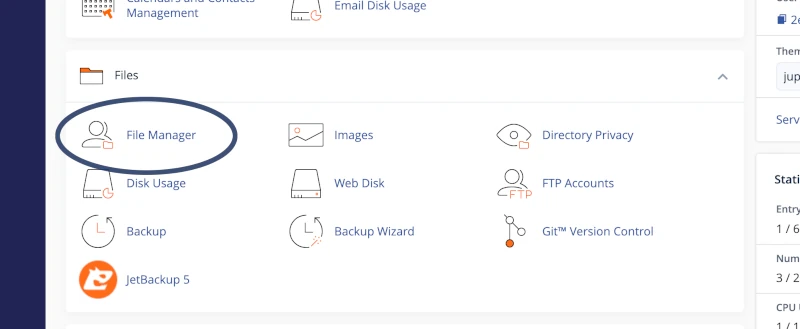
Log in to your cPanel, and click on file manager:
Click on the folder thats the document root of your domain (public_html if you have a single domain cPanel hosting account or check the domains section of your cPanel if you’re using a multi domain cPanel hosting account) on the left hand side, then cick upload (at the top).
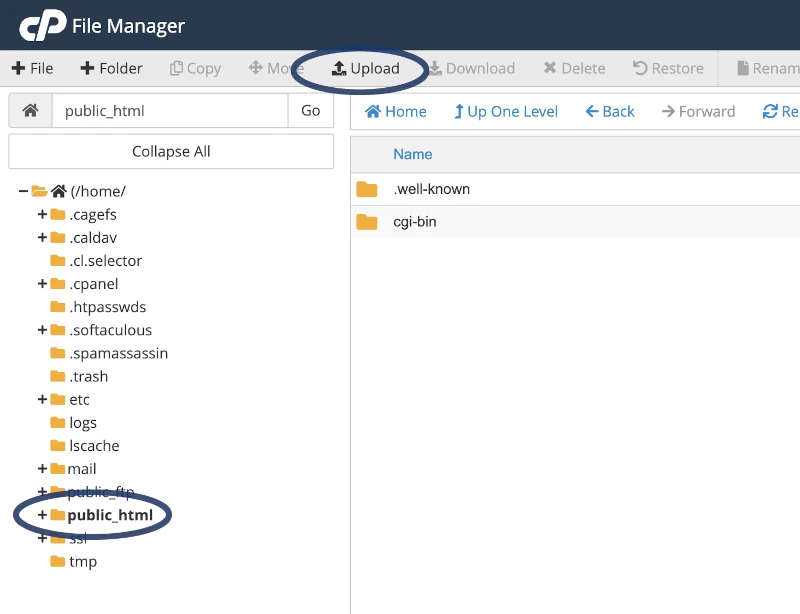
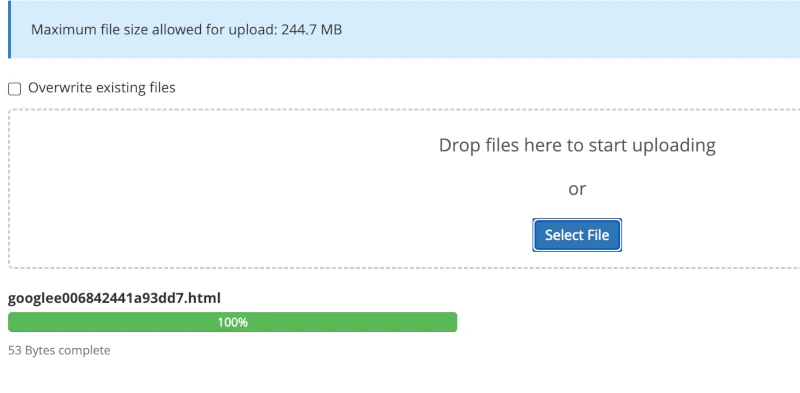
Upload the HTML file, by clicking the upload button:

Then selecting the HTML file you downloaded:

You should see this:
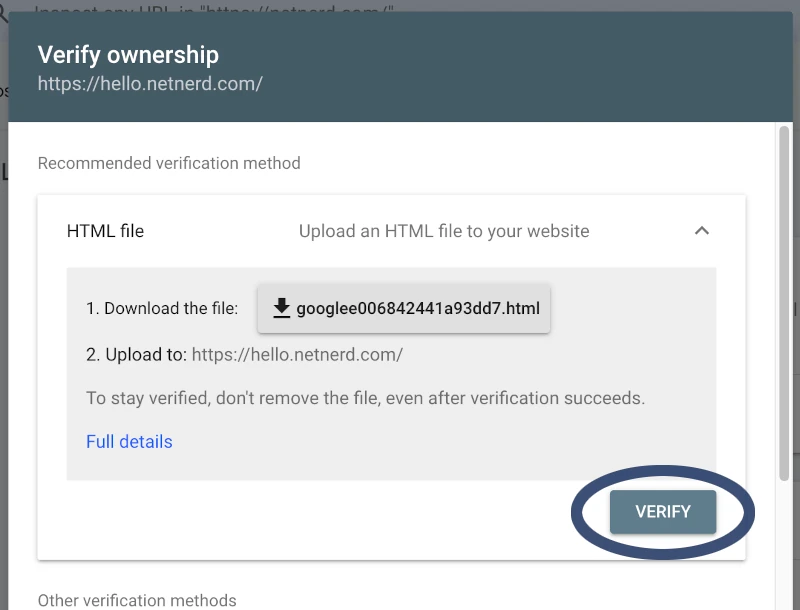
Compete verification in your google webmaster tools account by clicking the verify button:
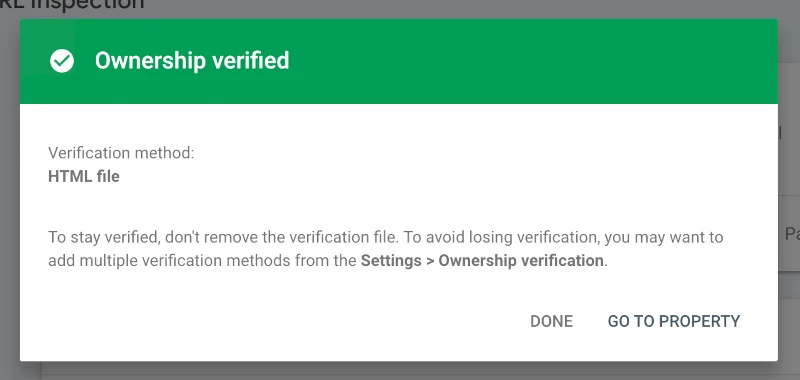
If you’ve carried out the above correctly, you’ll see the following:
Using a DNS TXT record to verify your website
Log in to your cPanel, then click the zone editor icon:

Click manage on the same line as your domain/site:

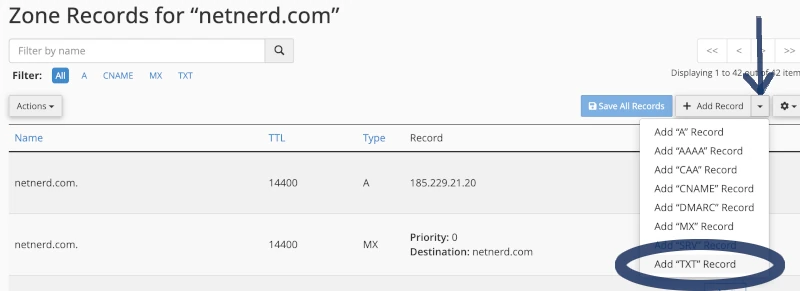
Click the small down arrow to the right of “Add record”, then click “Add “TXT” record:
Now, in a different tab go back to your google webmaster tools account, and toward the top right hand corner either click “add property” or click the drop down in the top right, then click “add property”:

Unless, you’re going to be using multiple subdomains, enter the address of your site in the URL Prefix section, then click continue:

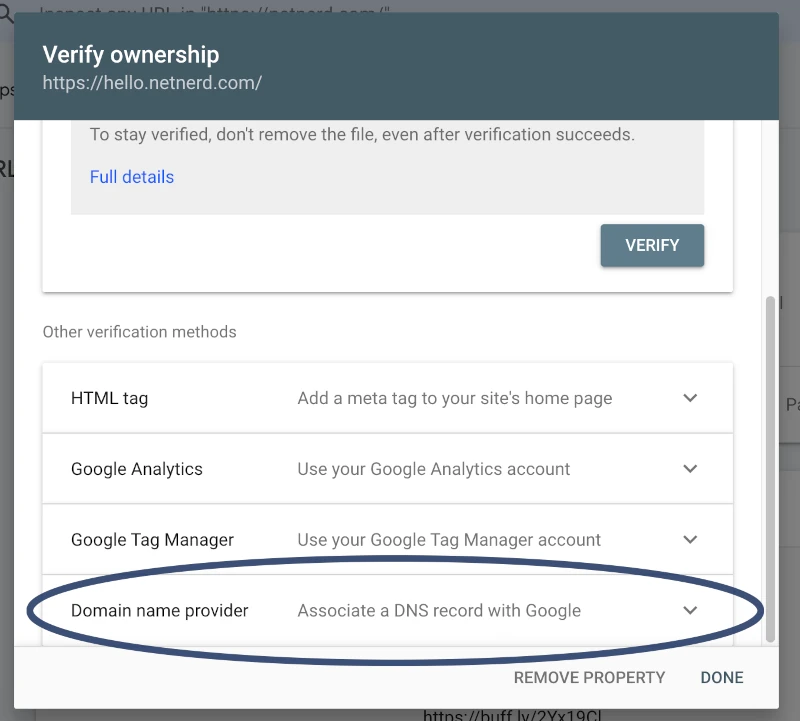
In the box that pops up scroll down, then click on DNS provider:
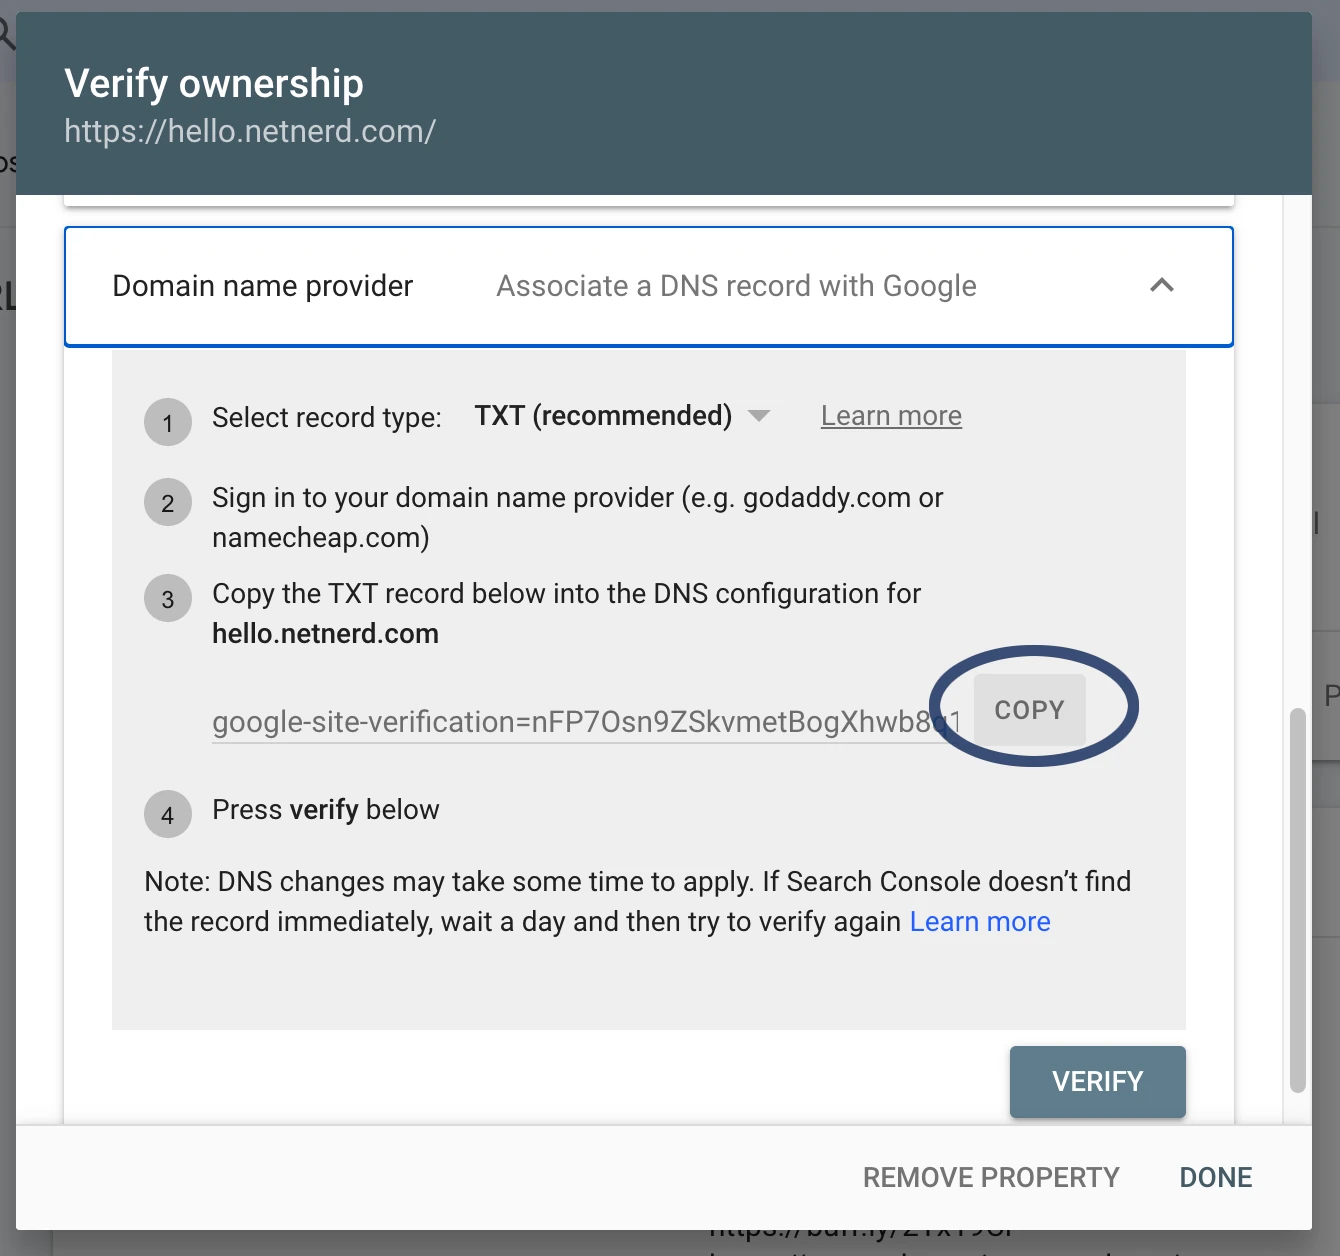
Then click “copy” on the same line as the verification record:
Now go back to the tab showing your cPanel, and you should still have this displayed:

In the left hand box type the domain of your site (without the https:// part at the front), in the right hand box, copy and paste the verification TXT value from our google webmaster tools account, hten click “save record”:

Then go bacck to your google webmaster tools account and click “verify” to complete verification in your google webmaster tools account:
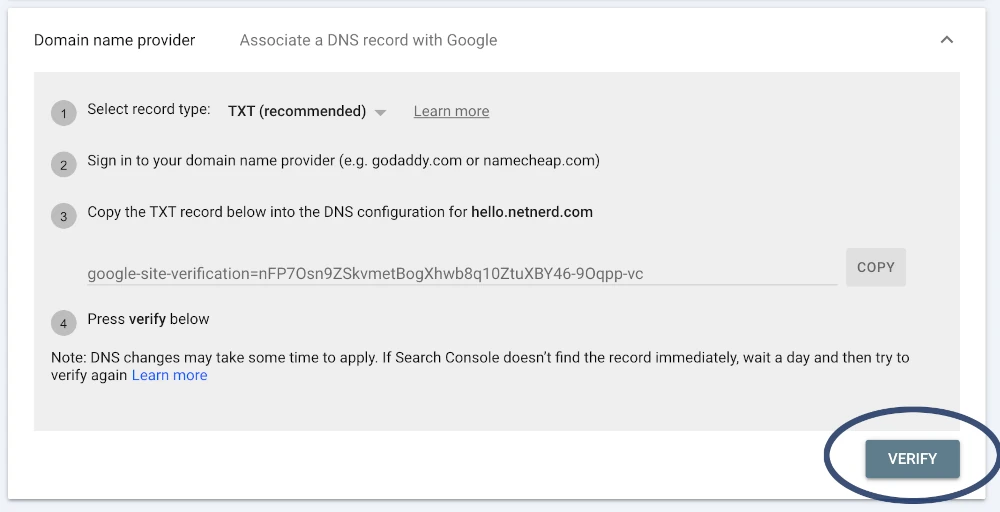
You’ll see a successfully verified message if you’ve carried out the above correctly.
Although you’ve added your site to your google webmaster tools account, this won’t prompt indexing to take place.
If you’d like to conform to best practices it’s a good idea to create a sitemap and a robots.txt before requesting indexing.
Using a sitemap
If you’re using WordPress to manage your new website, SEO plugins such as Rank Math and Yoast can be used to automatically make sitemaps. New pages and blog posts will be added to the sitemap as and when you publish them when using a plugin generated sitemap.
If you’re not using WordPress and the CMS you use doesn’t allow for some kind of automatic sitemap generation, you’ll have to manually manage your sitemap.
A sitemap, by default, is an XML file, that contains a list of your sites pages in XML format, including information about when respective pages were updated. If you’d like to give this a try, you can find google’s guidance in this capacity here:
Google’s manual sitemap guidance
If writing XML isn’t to your liking, there are sitemap generators that will read your site and make a sitemap for you (it’s always advisable to check that these contain all your pages), such as:
xml-sitemaps.com
powermapper.com sitemap generator
These tools will usually provide you with a sitemap.xml file, which you’d put in the document root of your domain (just like the HTML verification file).
Once your sitemap is in place, make sure that it’s publicly accessibly by trying to browse to it using a web browser. If the sitemap you’ve uploaded or are using is called sitemap.xml and your website is https://www.mynewwebsite.com the address of your sitemap is https://www.mynewwebsite.com/sitemap.xml .
Once you know your sitemap is accessible, you can tell google where your site map is by clicking on “Sitemaps” on the left hand side, and submitting your sitemap in the “Add a new sitemap” section.

Before you do this though, it might be worth putting a robots.txt in place.
Using a robots.txt
A very simple robots.txt might look like this (you’d need to adjust the sitemap part to your own sitemap):
User-Agent: *
Allow: /
Sitemap: https://www.mynewwebsite.com/sitemap.xml
What this robots.txt means is:
- What this robots.txt means is:
- User-Agent: * = All robots
- Allow: / = Read all the site
- Sitemap: https://www.mynewwebsite.com/sitemap.xml = A page sitemap can be found here
You could potentially use the above, put it in file called robots.txt and then put this file in the document root of your domain (just like the HTML verification file).
It is possible to add disallow directives to prevent parts of your site being read by crawlers (although this doesn’t hide content from the internet), and to define instructions for specific crawlers.
You can find google’s guidance covering robots.txt here.
And google’s guidance covering how to create a robots.txt file here.
If you would like to make your own robots.txt but need help generating it, there are online tools you can use to generate a robots.txt file:
DNSchekcer.org’s robots.txt generator
Generaterobotstxt robots.txt generator
Once you’ve generated your robots.txt file put this file in the document root of your domain (just like the HTML verification file).
How to request that google index your site
The URL inspection tool in your google webmaster tools account is used to request that google index a page of your site.
Click on URL Inspection, then enter the fill address of one of your website’s pages, then press return, and google will inspect the page you’ve entered:
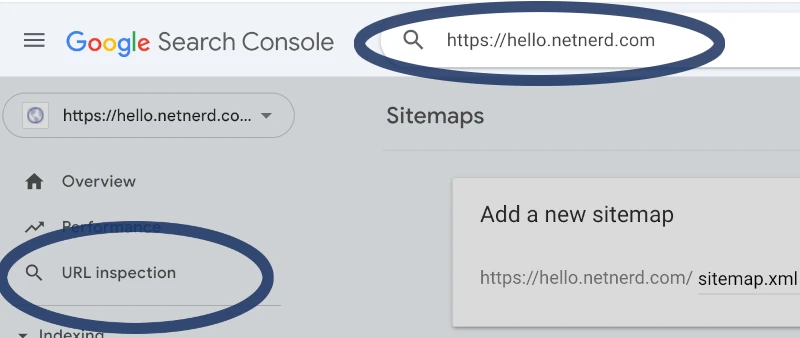
You’d click on “request indexing” to ask google to index the page you’ve inspected, but before you do that there are a couple of things to bear in mind:
- You can only request a certain amount of pages be indexed (usually 10-20 per day).
- Just because the page can be inspected it doesn’t mean it can be indexed. You can check the “Indexing allowed?” status in the page indexing section of the inspection results to find out. If the page can’t be indexed, you’ll need to address this before requesting indexing.
- Indexing doesn’t take place immediately. Be patient it can take google a few days to get round to indexing your site after you’ve requested it do so.

You’ll need to request google index all the pages you’d like to be found in search results on an individual basis. That’s how you add your website to google search.
What about bing and other search engines?
For other search engines the process to have your site indexed is almost identical. The difference is that you’d request indexing using a webmaster tools account belonging to the search engine with which you’d like to be indexed.
For example, if you’d like to have bing index your site you’d sign up for a bing webmaster tools account and then use it to request that bing index your site.

